
WHAT IS FLASH PHOTOGRAPHY
Flash photography simply means capturing images with the help of external artificial light. The light source can be any including a basic Speedlight or a professional studio strobe.
INTRODUCTION
If you are just getting started with outdoor flash photography, there would be many challenges that you might face. Mainly because you’ll be dealing with two types of exposures at the same time, one is the ambient light which is obviously the sun in this case and the other one is your flash. The entire outdoor flash photography is based on one single rule i.e., “Expose for the background”, which I learned from my teacher, Mr. Arun Kumar and I can’t thank him enough for the same. We’ll discuss the same in the upcoming paragraphs.
THE BIGGEST QUESTION
Now, the biggest question which arises in the minds of many people that why do we need an external light source when shooting outdoors, its already so much sunlight out there then why do we need a separate artificial light source? Once you know how to photograph using flash at outdoor locations, you’ll be stunned by the quality of images that you’ll be able to create. Let’s look at some of the images below.


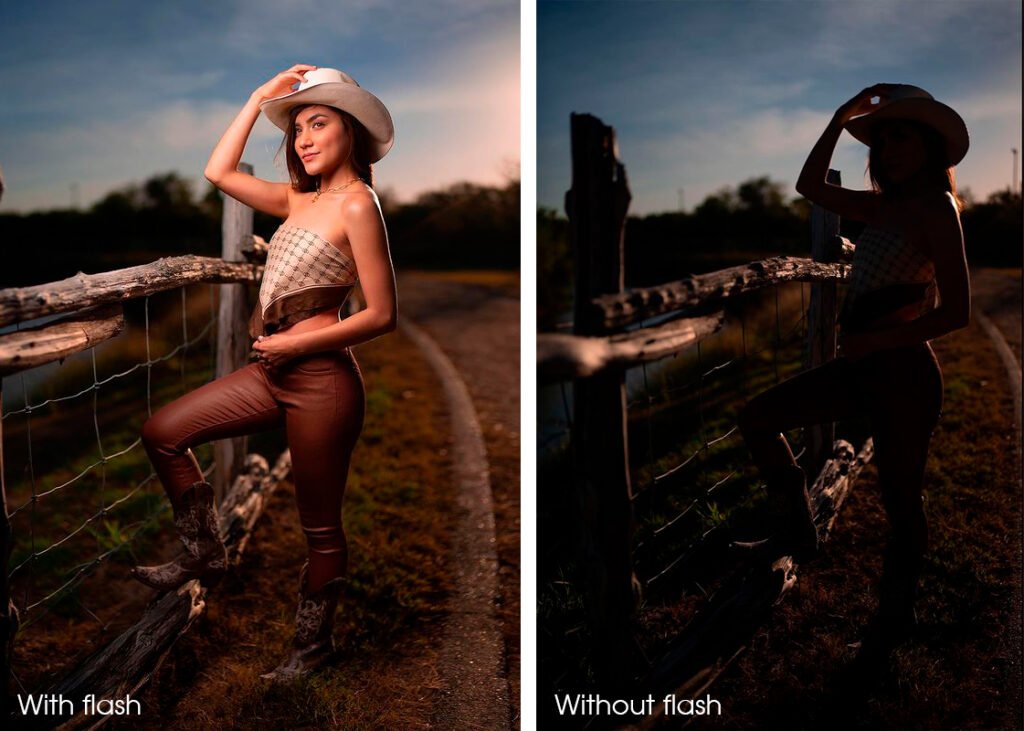
Image courtesy- Francisco Joel Hernandez
From the above images, it is evident that what impact can an external flash create on your images. Now let us understand the rule of “Expose for the background”.
RULE OF “EXPOSE FOR THE BACKGROUND”
As the name suggests, without turning out your flash at first, turn on your camera and just light up the background using the exposure triangle. Once your background has been exposed enough according to your needs and requirements, now turn on your flashlight and take a test shot. If the light falling your subject is not enough, simply increase the power output of your light and vice versa. Now, you don’t need to change your camera settings again and again until or unless you change your location or you want to control your background. Using this simple rule, you can master outdoor flash photography and can take every single shot you can probably imagine.
GETTING SOFTER LIGHT
There are many ways to get softer and even lighting which incudes:-
- Bouncing the light from a wall or ceiling (which is obviously not possible at outdoor locations)
- Using light modifiers
Using light modifiers is the best possible way which can be used to get softer lighting, There are so many kinds of light modifiers by different brands available out there. Some of the popular brands are Broncolor, Profoto, Godox, Elinchrom, and many more. You can get some of them according to your budget. Godox has some really good options which fit in almost everyone’s budget.
Some of the most commonly used light modifiers include-
- Octagonal softboxes
- Strip boxes
- Beauty dishes
- Square softboxes
The most widely used among all of them is an Octagonal softbox. It’s really easy to use and provides a very soft and directional flow to your light by attaching a honeycomb grid to it. I personally use the same and the results are just outstanding. The one I use is this.
USE YOUR FLASH OFF-CAMERA FOR BETTER RESULTS
Using your flash wirelessly can open a whole lot of opportunities for you that an on-camera flash can’t do. You can change the direction of light and create many different images. Below are some of the examples:-
- Split Lighting

This image is a perfect example of split lighting. As you can see, the light is hitting the face of the model from the right and the other side is completely dark.
2. Rim Light

This image was shot by me at my studio. In this particular image, 2 studio strobes are used from the back creating a beautiful rim of light on the edges of the bottle and the glass.
3. Butterfly Lighting

Above diagram exhibits a perfect example of butterfly lighting. In this kind of setup, light is placed directly overhead on the model which creates a beautiful triangle on the face.
4. Rembrandt Lighting

It is a lighting technique in which a triangle is created under one of the subject’s eyes. This is also one of the commonly used lighting techniques. In this particular technique, mostly, one light and one reflector are used to bounce back light.
All of the above mentioned lighting techniques can be used Indoors as well as outdoors. That’s it for this blog. Hope you guys gained something out of it:)
Still have questions? Fill out this form with your queries and I’ll get back to you as soon as possible.